2.3.4.3. Set up users
2.3.4.3.1. About users
Makahiki supports the following types of users:
- Player. These are the most common type of users who actually play the challenge. All challenges must have some players.
- Admin. The admin user has access to the Settings and Status page, and has the ability to configure, design, and manage the challenge. All challenges must have at least one Admin.
- RA. This is a special-purpose role provided for dorm energy challenges, where you might wish special capabilities or game mechanics for RAs. The RA role is optional for challenges.
As part of the installation process (see Install Makahiki), you create an environment variable that defines an initial admin account and username. As a result, every Makahiki installation has at least one admin account. After logging in with this account, it is possible to use this page to create additional users and provide them with admin status. This is quite desirable in order, for example, to distribute the workload of processing Smart Grid Game submissions.
In addition to defining additional admin accounts, the other primary purpose of this page is to create accounts for all players of a challenge. In the current version of Makahiki, the administrator must define all player accounts; it is not possible for users to “register” themselves online and obtain an account to play.
Creating a player requires providing their name, their account name, and the team to which they belong. You can do this individually, or if you need to define many players, you can create and upload a file.
Note
Configuration of users is required. At a minimum, you must delete the default users and add new users corresponding to the players in your challenge.
2.3.4.3.2. Getting to the users page
After clicking on the “Users” link in the Challenge Design, a page similar to the following should appear:
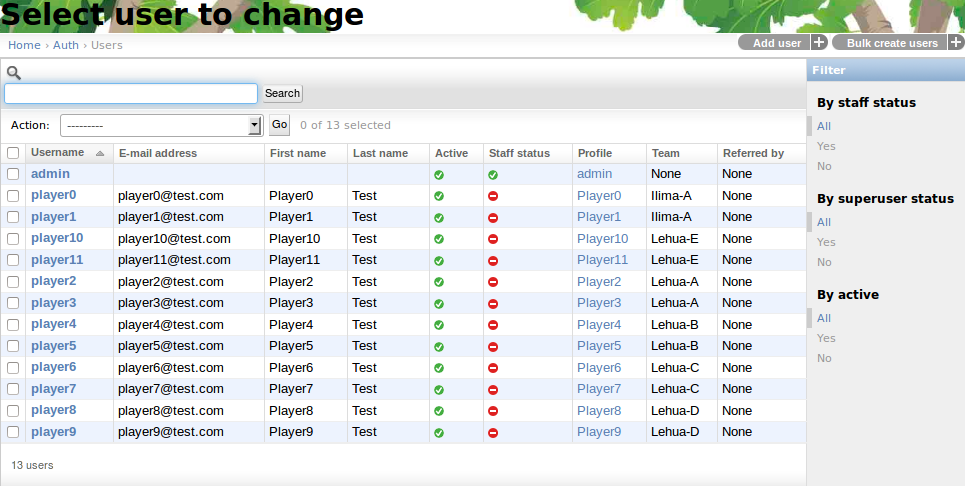
To add a new player, click the “Add user” button in the upper right corner.
This is a two step processes. You will be asked to input the username and password for the user first, then, the next step will ask you to input the user’s first name, last name, and other user account info.
2.3.4.3.3. About the user profile
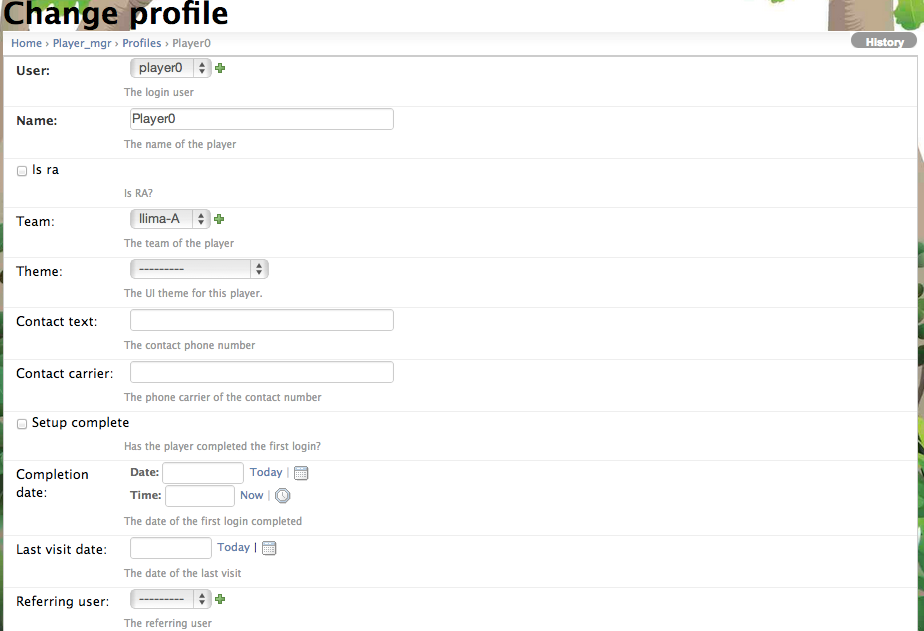
When a new user is created, a “Profile” is also created for this user, as shown in the “Profile” link in the list. The Profile has more detailed information about the user, such as the display name, team which this user belongs to, and the contact info etc.
The following screen shows an example of a player’s profile settings looks like:
Note
When creating a user, you will normally want to specify the team this player belongs to. After you create the user, you can click on the Profile link in the user list, and specify the team in this player’s profile setting page.
Note
By default, the admin user does not belong to any team. You can temporarily assign the admin user to a team for testing purpose. For example, if you want to see Energy usage of a team, you could temporarily change the admin user to that team then go to the “Go Low” page to see the energy usage. Make sure you un-assign the admin from any team once the testing is done, otherwise, the admin will be participating in the challenge as a team member for the team he is assigned to, which may not be what your intent is.
2.3.4.3.4. Changing the information associated with an existing user
Due to Django, Makahiki stores information about a user in two places:
- Click on the “username” link to bring up a page to modify basic information about the user.
- Click on the “profile” link to bring up a page to modify additional information about the user.
2.3.4.3.5. Defining multiple users through file upload
To load a list of users defined in a csv file, the “Bulk create users” button could be used, which will prompt you to upload a CSV file from your local computer.
The format of the csv file is as follows:
team, firstname, lastname, email, username, password
This step will create both the User objects and Profile objects in the system for the users specified in CSV file.
Note
Remember to click the Save button at the bottom of the page when finished to save your changes.